Tag: Making
Homemade Wine Making Equipment
Posted onIf you’re thinking about making your own homemade wine, here are some things you should know about the equipment required to get you started.
First and foremost, we need to talk about cost. You could visit online merchants here, there and everywhere to shop around for the best prices on individual items you’ll need to start making your own wine, but most sites that sell equipment offer some sort of beginning equipment kit that will have all the items you need to get your wine making career started. This is absolutely the best way to go in my opinion. Kits will run anywhere from $ 80-$ 150. That’s a lot of money, but this equipment can be used over and ever and thus will eventually pay for itself.
So what’s included in a kit, anyway? For starters you’ll get a plastic primary fermentation bucket, usually around 8 gallons. After primary fermentation you’ll need something to transfer your wine into for secondary fermentation. This is usually a 5 or 6 gallon glass bottle, called a carboy, although in some kits the secondary is plastic.
Also included will be some rubber stoppers that fit the fermenting vessels, and an airlock, which is a device used to let carbon dioxide out when your wine is fermenting while not allowing air and bacteria in. You should also get a couple of brushes, one for cleaning the bottles and another so you can clean the carboy.
Some sort of cleaning agent and also a sanitizer will be included. Cleaning and sanitizing is a crucial step when making wine. A length of plastic tubing will be supplied, and a sometimes a device called a racking tube which aids in transferring your wine from one vessel to the other. Some kits also include a little device to slip onto the plastic tube that allows you to shut off the flow of wine when you’re bottling.
Most kits include a hydrometer. This is a device that measures the specific gravity of the wine during various stages of development. You can also use it to measure the potential alcohol of your wine. Corks are also in most equipment kits, as is some sort of corker to insert the corks.
This is the minimum list of items, and you’ll find some kits that include much more. What is generally NOT included is an ingredient kit, although some sellers will allow you to add one to your package for a reduced price and if you can afford it, this is a good way to go. Bottles are usually not included either, but are easy to collect from friends and family.
Consider getting started making your own homemade wine today. It’s a fun and fascinating hobby that you can explore endlessly.
History of Wine Making
Posted onThe history of wine can be classified into four periods: the Ancient Times, the Dark Ages, the New World and the Modern Days.
Ancient Times
Mesopotamia. Evidence of grape cultivation and wine production were found dating as far back as 6000BC.
Egypt. Egyptians made first records of grape harvest and wine making. Wine was regarded a measurement of one’s social status and is used for religious rituals.
Greece. Wine played an important part in the religion of ancient Greece particularly attributed to the god Dionysus. It was also regarded as a social drink for the privileged upper class.
Rome. Wine making technology was considerably improved and wine became available even to the common people.
China. The Chinese initially used wild grapes for their wine, cultivation of grapes didn’t start until after Zhang Qian’s exploration to Western Kingdoms where he acquired vines. Wine from grapes was therefore considered exotic and were reserved only for the Emperor’s consumption.
Dark Ages
Following the decline of Rome, the Christian Church became a staunch supporter of wine necessary for celebration of the Catholic Mass while Muslim chemists pioneered the distillation of wine for medicinal purposes.
Middle East. Alcoholic drinks were prohibited, but alcohol production particularly wine, have thrived. Egyptian Jews leased vineyards from the Fatimid and Mamluk governments and produced wine for sacramental and medicinal use. Christian monasteries in Levant and Iraq cultivated grapes and distributed their vintages to taverns located inside monastery grounds. Zoroastrians in Persia and Central Asia also engaged in wine production, though not much is known regarding their wine trade. However, they are known for their taverns.
Medieval Europe. Benedictine monks were one of the largest producers of wine in France and Germany, followed closely by the Cistercians. The Templar, and Carmelite orders were also notable wine producers.
New World
New World wines came to a rise and challenged Old World wines in the 19th century.
The Americas. Grapes were brought to what is now known as Latin America by Spanish conquistadores. Succeeding waves of immigrants imported grapes from France, Italy and Germany.
American wine was generally looked upon as inferior to European product until the latter half of the 20th century; New World wine began to gain respect after a surprising showing at the 1976Paris Wine tasting.
Australia, New Zealand and South Africa. Until late in the 20th century, Australia exported mostly to the United Kingdom while New Zealand kept most of its wine internally and South Africa was closed off to much of the world market due to apartheid.
Modern Days
Wine making developed greatly in terms of scientific background therefore allowing a lot of things that were once impossible to be accomplished. Wine makers of this day are now able to gain total control of every stage in wine making. The challenge now for wine makers is to produce wine for a much larger market without losing the character and distinct flavor of their wines. More and more countries are now producing more varieties of wine and advances in technology will ensure that such trend will continue.
Homemade Wine Making Facts
Posted onWine is more popular than ever in the United States. There are almost 3000 vineyards in the US, with at least one winery in every state. Most US wine production occurs in the west, with the states of California, Washington and Oregon leading the way.
Here’s something you may not know. More and more people are discovering the fascinating hobby of making their own homemade wine. If you’ve ever thought about making your own wine at home, there’s no better time to start than right now. Let’s take a look at what’s involved to get started making your own wine.
First of all, you really don’t need a lot of space to get begin. All the wine I’ve made, a couple thousand bottles, has been produced in my 10 X 15 foot kitchen. And all the equipment you’ll need can be hidden away in a hall closet when it’s not in use. So for most folks space is not an issue.
Time is a factor for most people these days. Homemade wine making need not be labor intensive. When using wine making kits, the absolute easiest way to get started, the total time you’ll spend from starting a batch to carefully putting the last drop into the bottle will be approximately 4-5 hours, spread over a one month period.
Money is another factor for most folks these days. A basic wine making equipment kit will cost approximately $ 100 to $ 140 depending upon where you’re shopping. This equipment can be used over and over again, so the initial investment will eventually pay for itself.
Ingredient kits can cost $ 60 to $ 150, putting your cost per bottle in the $ 2 to $ 5 range. This is a bargain for the high quality, delicious wines that are being produced by homemade winemakers.
Wine making is a fun and fascinating hobby. You can begin with the basics and stay there, producing high-quality wines that you and your friends and family will enjoy. If you have a creative side and love to explore new things, you can take your wine making hobby as far as your creative desires will lead you.
Wine making is fun, economical, and easier to do than you think. Begin your wine making journey today!
Wine Making and Tasting
Posted onIn your search for wine making recipes online, you will encounter a variety of interesting recipes from which to choose; there are standard ones for beginners, variations from the classics, innovative ones that are exciting to make, and there are the organic recipes to keep you fit and healthy.
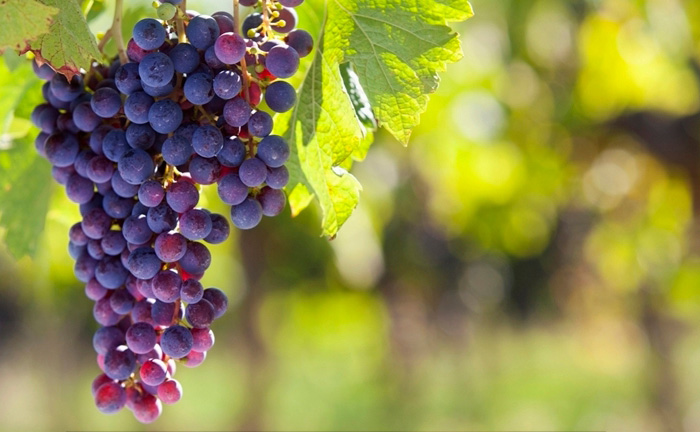
With a jug of water, some yeast and pectic enzyme, some sugar, and other flavorings, there are many homemade wine making recipes you can experiment with. You can make wine from your favorite fruits like your all-time favorite grapes and strawberries as well as apples, apricots, peaches, bananas, pineapples, and all sorts of berries. You can also make them from nuts like almonds and hazelnuts. You can try roses, lilac, and dandelions, too. There is a world of wine making recipes out there, and they’re just a click away.
To say a wine is sound and round or well-rounded, means it is well-balanced. Smooth means that the wine is just right, while sharp and rough mean that the wine is imbalanced a bit strong and falling between sour and tart in terms of acidity. Silky means that the wine is fine and balanced. In essence, wine has three basic components: Fruit, acidity, and tannin. To make a good wine, these three components must be in balance, not overwhelming.
There are variations in taste, such as soft in contrast to hard and light in contrast to heavy referring to tannins. Based on its flavor, a wine might be described as nutty or earthy. It would be unfavorable and faulty if it were said to be mousy, musty, moldy, or faded. As the names imply, Yuck!
A wine’s dosage means the amount of sugar added to wine, especially to sparkling wine. Thus, derive the terms sweet and dry and the semi’s in between. Cloying, on the other hand, suggests that the wine is too sweet for comfort.
As a whole, a wine should have a finish that is pleasant just as you swallow, and an aftertaste that is likewise pleasant after you swallow the wine and it lingers inside your mouth.
Aroma is how a young wine smells. Green is what it tastes like. Clean is when you have no complaints, and herbaceous is as grassy and organic as they get. Thin is when the wine is bland, and hot is when wine really burns. It’s for fire-breathing dragons and not for you.
But the most important ingredients of all, you find inside yourself. Wine making involves a passionate desire to learn. It entails patience and discipline. It takes time. You ferment, blend, and age along with it, with grace. It takes a real love for wine, be it white or red, sweet or dry, crackling or sparkling, local or foreign.
They say the best way to know wine is to drink some and enjoy some. Get to know the experience of it. Appreciate the nuances of each unique kind and brand. Wine can be very much a part of every dining experience and many celebrations in our lifetime.
There are many good wine recipes and every recipe can be extraordinary.
Related Malbec Wine Articles
Wine Making Yeast Bits
Posted onWhat separates wine from simple juice is the fermentation process in wine making. Fermentation involves wine making yeast, not any other type of yeast like your bread yeast.
Importance
Wine yeast is the most important ingredient in wine making. Not only as an ingredient but the process of mixing it with the must will make or break the whole batch of wine. It is said that the real winemaker is not the person making the wine but the yeast itself. The yeast works to absorb the sugar from the fruit and creating alcohol and carbon dioxide in equal portions.
Timing
The timing of mixing in the yeast is crucial as well. One can neither put the yeast too early nor too late, in the whole wine process. At best, wine making yeast is mixed in at least twenty four hours after the fruit is crushed. And it is left to stand interacting with the must for at least five to seven days, with only a few stirring twice to thrice a day.
Activation
For better results, wine making yeast must be activated first before mixing it into the fruit must. How? Mix the yeast into a cup of juice squeezed from the must and set aside for at least twelve hours before mixing it into the must. Or a cup of warm water will suffice. Do not use hot water as the temperature will kill the yeast rather than activating it. You know the yeast is active when the mixture looks like it is boiling.
Buying
Buying yeast is extremely easy. Just make sure that the label reads wine making yeast or something to that fashion. Any generic brand will make do for the amateurs. But if you are the brave type or already an aficionado, those specialty types are great choices. The amount you buy is also noteworthy, a ten milligram packet of yeast is sufficient to work on ten gallons of grape must.
So you see, even the hardest part of the wine process, which is the part involving wine yeast, is relatively easy once you know why it is crucial, what to buy and how and when to use it.
More Malbec Wine Articles
Featured wine
popular posts
-
re is a professional English article formatted with WordPress block editor syntax (using `` and other blocks)
7-11 2026It outputs pure HTML without any Markdown. Zinfandel Serving Temperature Guide Zinfandel is one of the most versatile and expressive red wine varietals, beloved Read More
-
re is the professional article you requested, written in a journalistic style suitable for a wine industry publication or a science blog
7-10 2026— Title: Climate change effects on Syrah grapes By [Your Name/Staff Writer] For decades, the Syrah grape—known for its bold, peppery character and deep Read More